


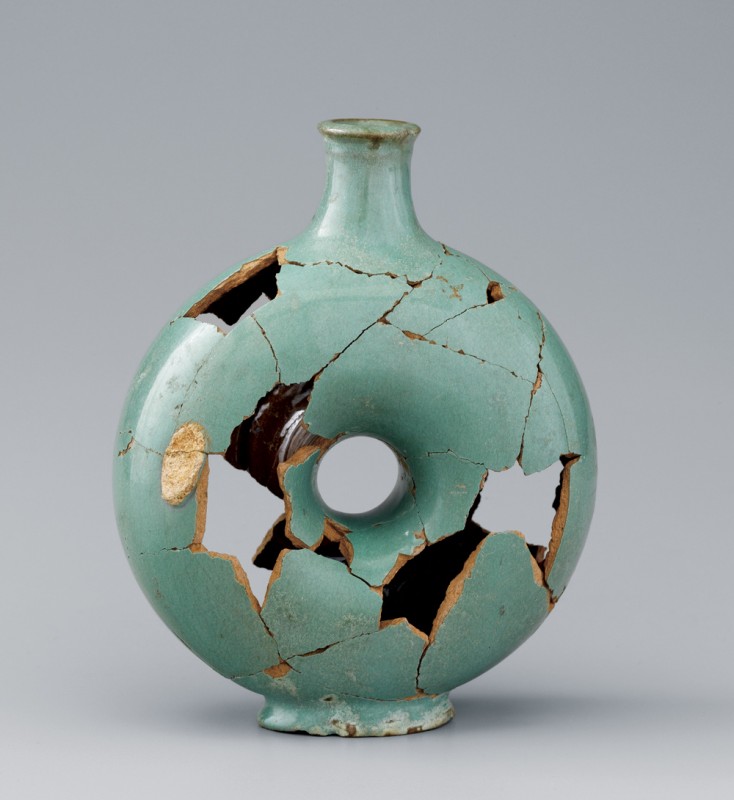
Ring bottle, Salem, North Carolina, 1793–1800. Tin-glazed earthenware. H. 7". (Courtesy, Old Salem Museums & Gardens; unless otherwise noted, photos by Gavin Ashworth.) This nearly complete example was reassembled from the fragments illustrated in fig. 2.

Field photograph of the excavation of ring bottle fragments on Lot 49 in Salem, North Carolina, 1968. (Courtesy, Old Salem Photo Collection.)
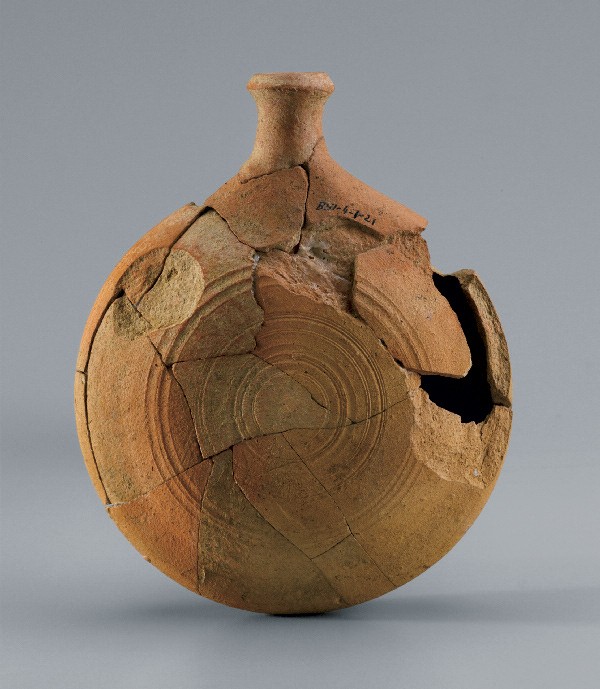
Flask, recovered at the site of Gottfried Aust’s pottery, Bethabara, North Carolina. 1755–1772. Earthenware. H 5". (Courtesy, Historic Bethabara Park.) This flask (a term that does not appear on any of the pottery inventories) was excavated from one of Aust’s waster pits. The flat side of the flask represents the foot of the saucer when it was initially thrown on the wheel.

Ring bottle fragment, Salem, North Carolina, 1795–1800. Tin-glazed earthenware. (Courtesy, Old Salem Museums & Gardens.) This fragmentary example shows the interior construction and glazing. Note the throwing rings, visible on the interior base.
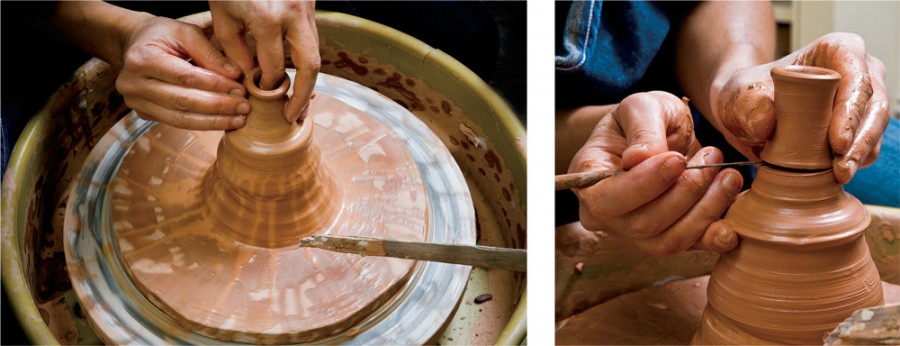
The spouts for the ring bottles are thrown separately. Multiple spouts can be quickly thrown from this clay hump. The spouts are finished with a simple lip, then cut off and allowed to dry to a leather-hard state.
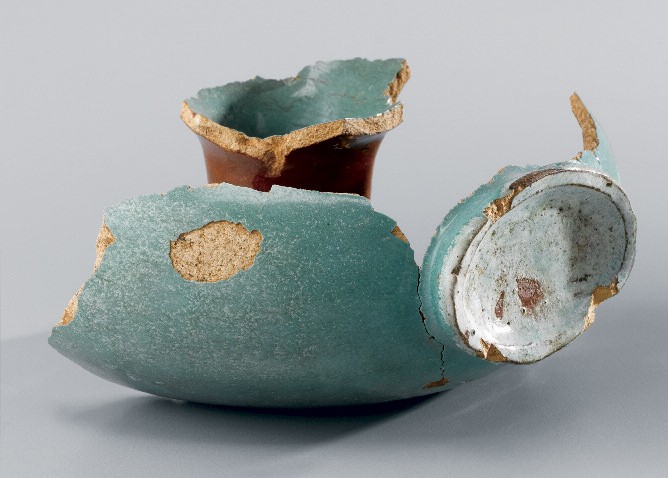
Exterior of the fragmentary ring bottle illustrated in fig. 4, showing the attached pad foot.
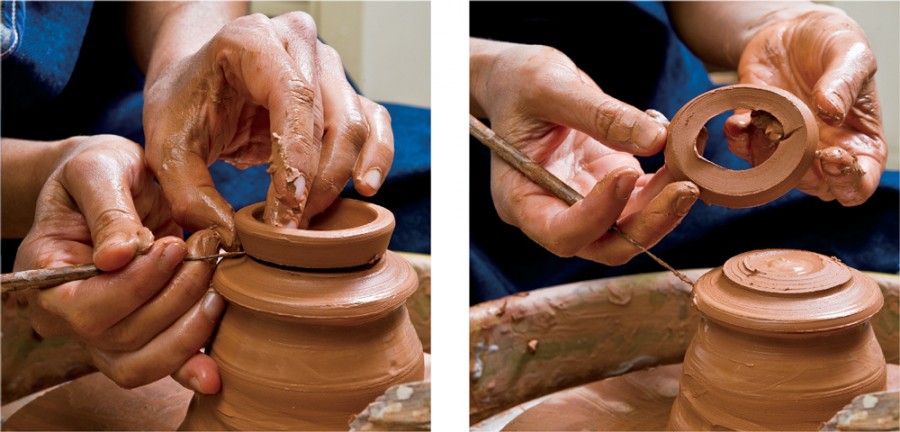
The pad foot, also thrown from the hump and in multiples, is shaped into an oval. Note that it is thrown upside down to create a wider flat edge, which is attached to the body. The thrown feet are set aside and allowed to dry to a leather-hard state.
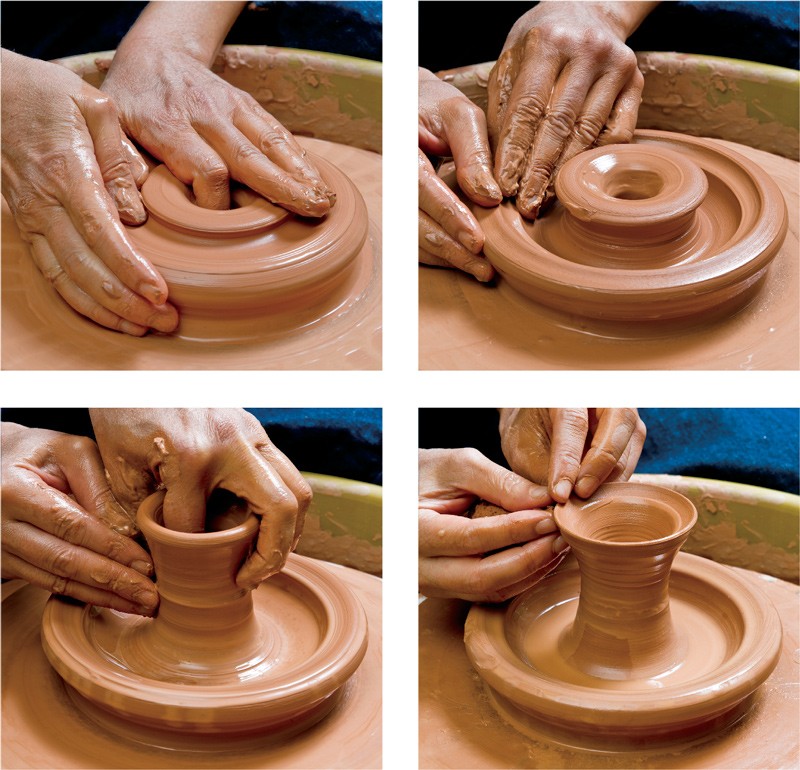
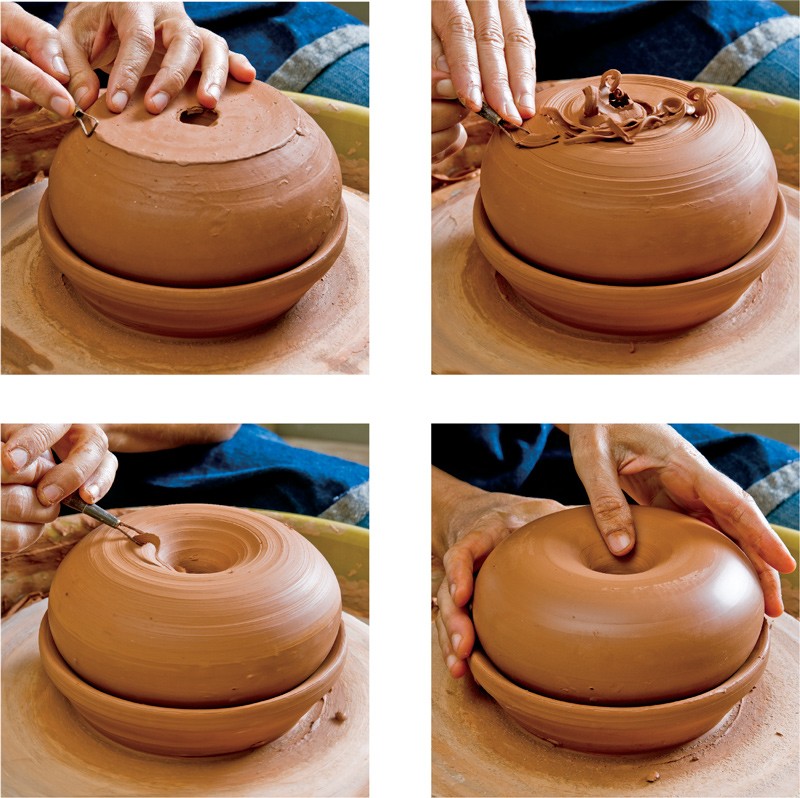
The first stage of throwing the ring body begins with centering the clay and making preparation for raising a two-walled vessel. A hole is made in the center, creating a ring. The ring is then divided to form an exterior and an interior wall. The interior wall is pulled up, and the top rim flared.
Once the interior column is prepared, the exterior wall is raised in anticipation of joining it to the inside wall. During the process, the final shape of the bottle must be considered, as adjustments are difficult to make.
The most delicate step in the throwing process is the joining of the two walls with the lip of the interior column overlapping the top of the exterior wall. The clay at this juncture is at its thinnest. The overall width and height are set at this point and will vary only slightly during the final shaping.
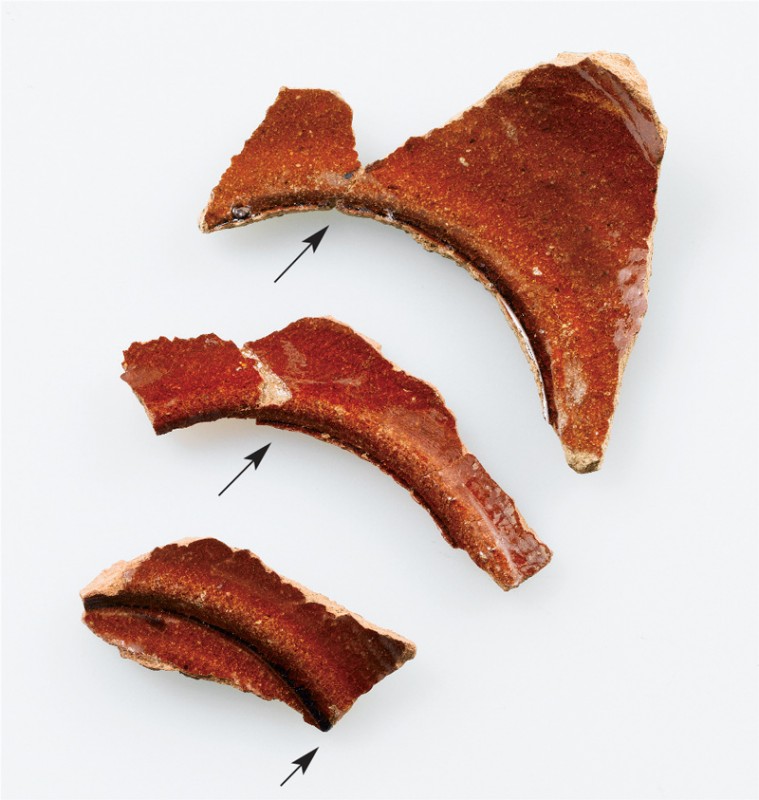
Fragments of the original ring bottles show where the attachment of the two walls occurred. These fragments were also diagnostic in determining that the inner column flange overlapped the exterior wall. Most of the breaks on the fragments occurred at this weak point.

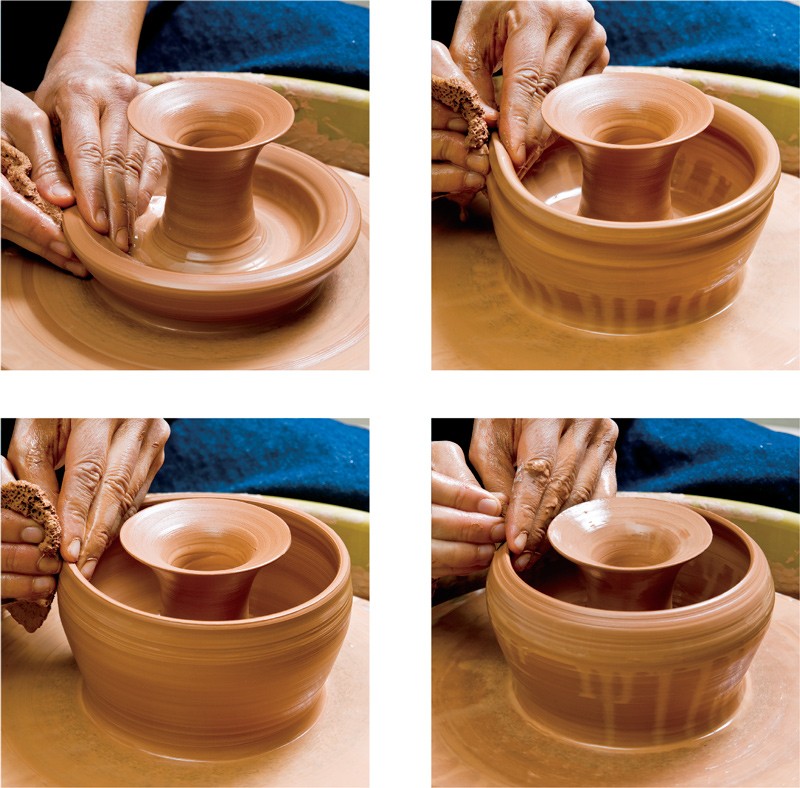
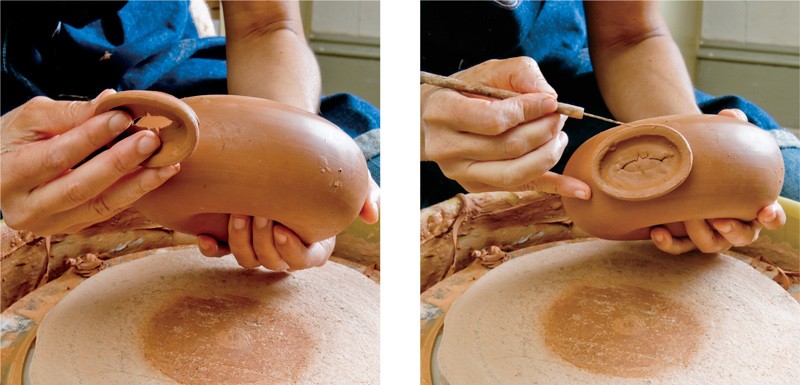
Using a wooden rib, the upper part of the ring is given its final contour and smoothed. The now-hollow ring is then cut from the wheel with a wire.
It is necessary to finish the bottom contours of the ring through trimming. A saucerlike clay chuck supports the rounded underside, preventing it from flattening during the trimming process. The excess clay is trimmed and smoothed to create the final form. Air trapped inside the ring prevents the form from collapsing.
The foot is attached to the finished ring, smoothing the seams. Applying the foot first enables the bottle to stand upright to help orient the position of the spout.
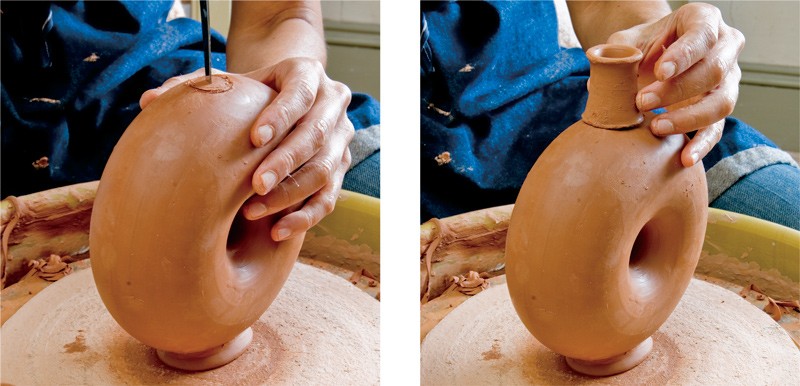
The final step in the assembly is to cut the hole in the top of the ring and then attach the spout, smoothing the exterior seam. This is done with the bottle affixed to the wheel.

Detail of a ring bottle fragment, showing the interior attachment of the spout to the body. (Courtesy, Old Salem Museums & Gardens.)
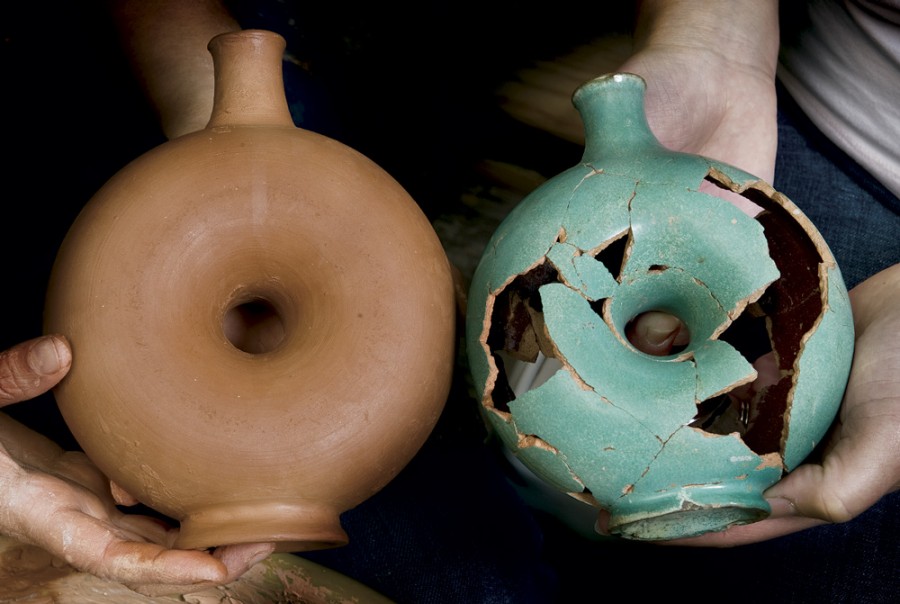
The finished demonstration ring bottle is shown next to the bottle illustrated in fig. 1. The newly made bottle is approximately 10 percent larger at this stage, but it will shrink to size during drying and firing.
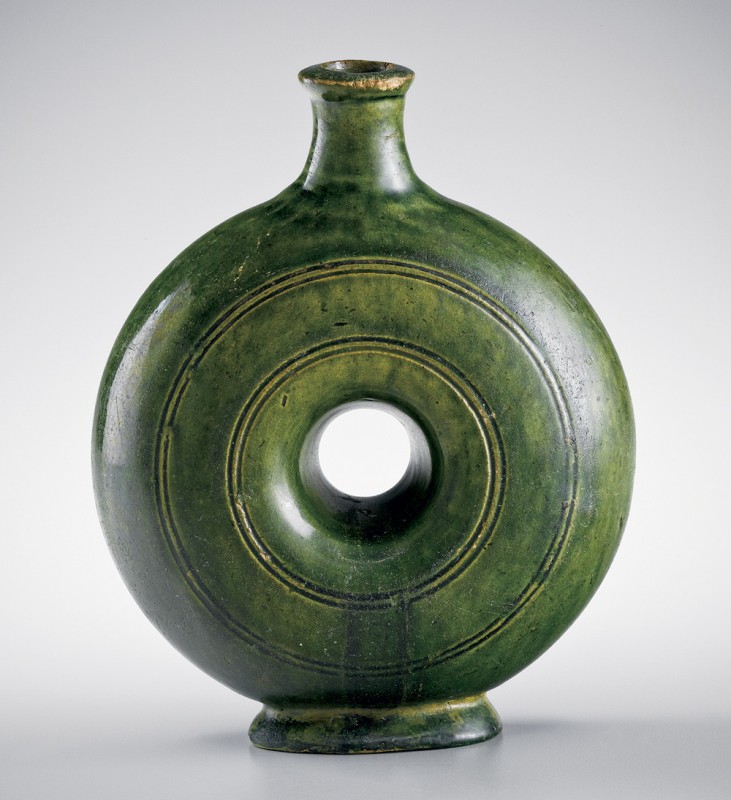
Ring bottle, Salem, North Carolina, 1795–1810. Lead-glazed earthenware. H. 4". (Private collection.)