


Mug, Salem, North Carolina, 1774–1786. Lead-glazed earthenware. H. 5 1/8". (Courtesy, Old Salem Museums & Gardens; unless otherwise noted, photos by Gavin Ashworth.)
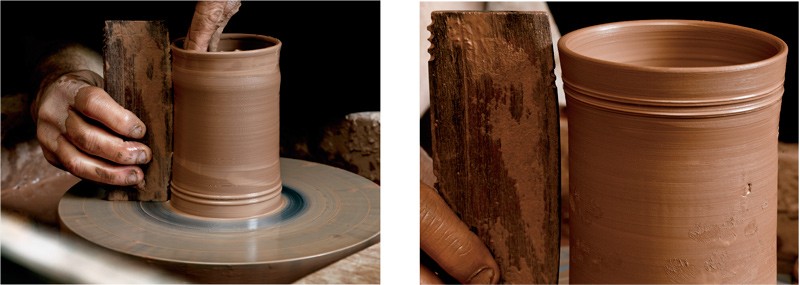
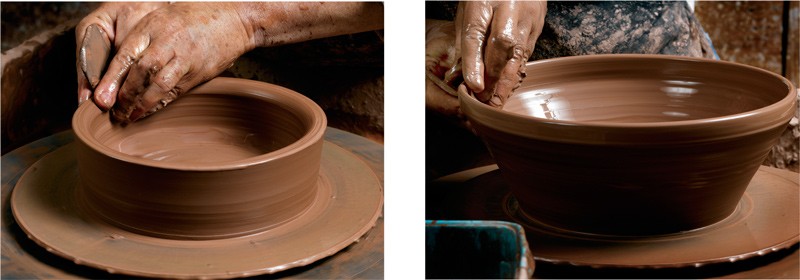
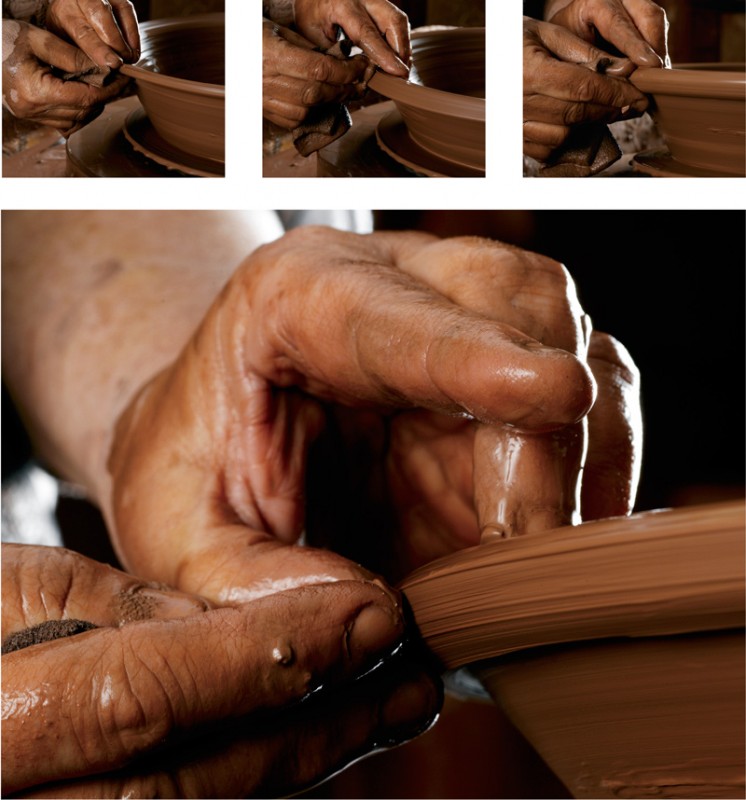
When turning has been completed, finger grooves are apparent on both the outside and the inside of the body. On the outside, use of a rib creates a very smooth surface.
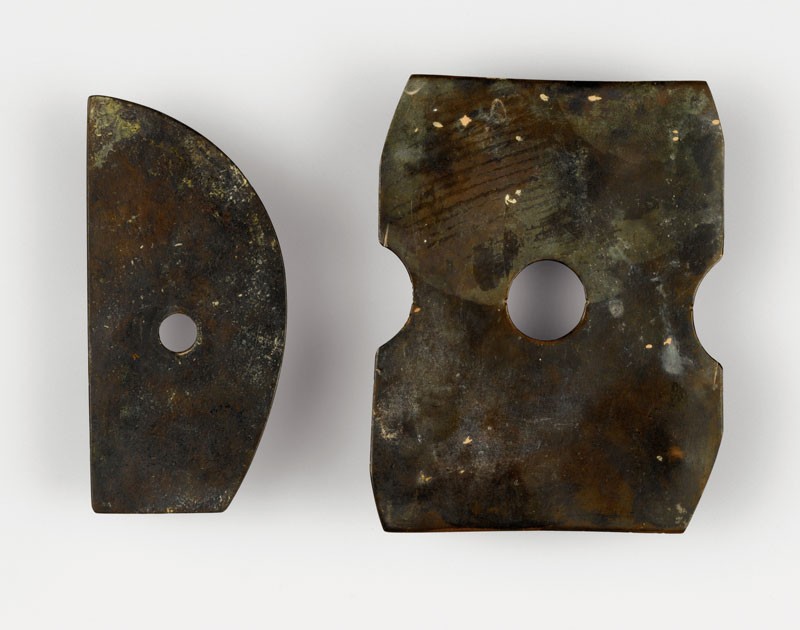
Ribs, Salem, North Carolina, 1820–1860. Copper (left) and brass (right). (Courtesy, Old Salem Museums & Gardens.)
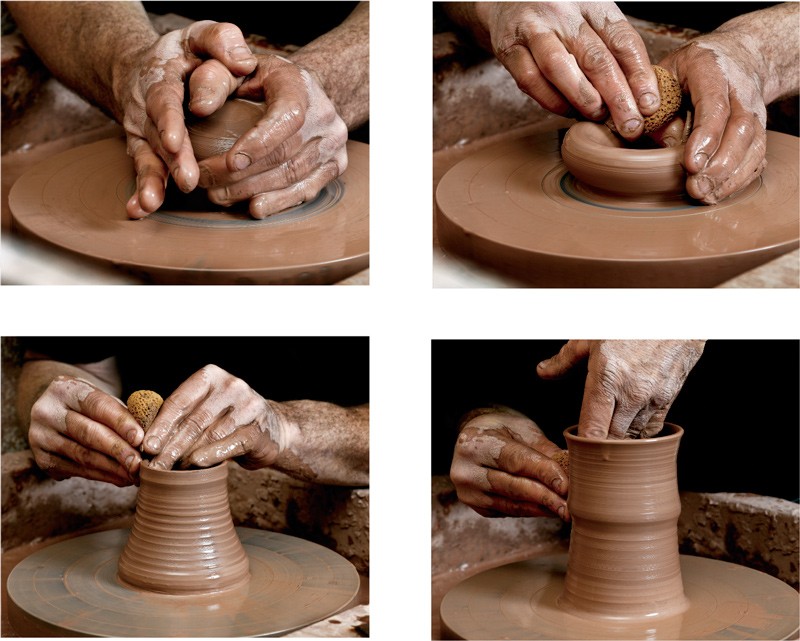
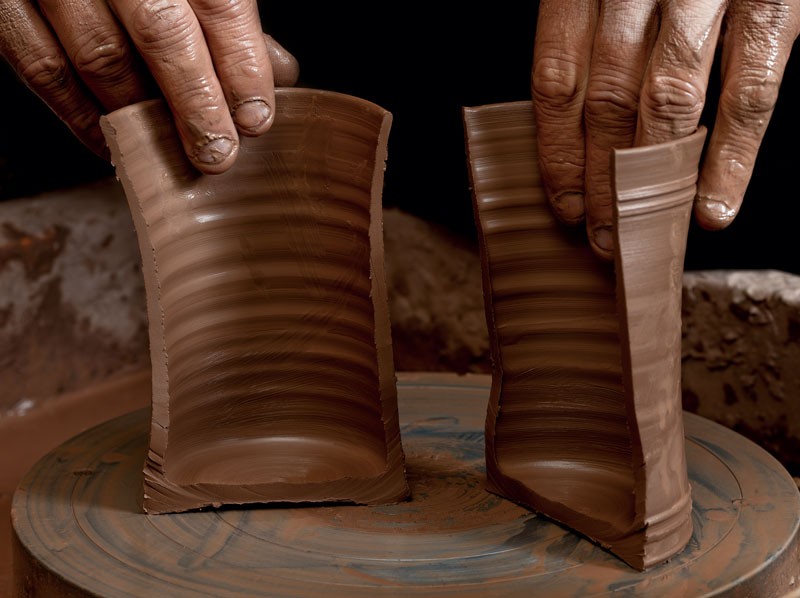
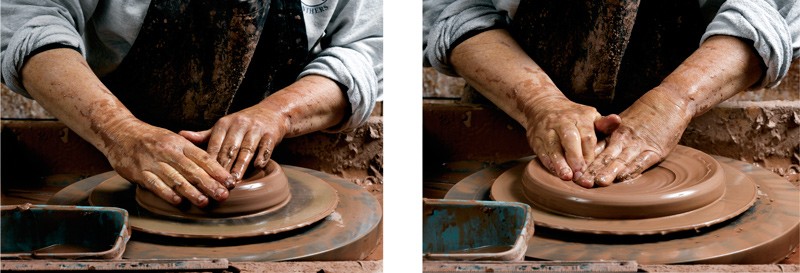
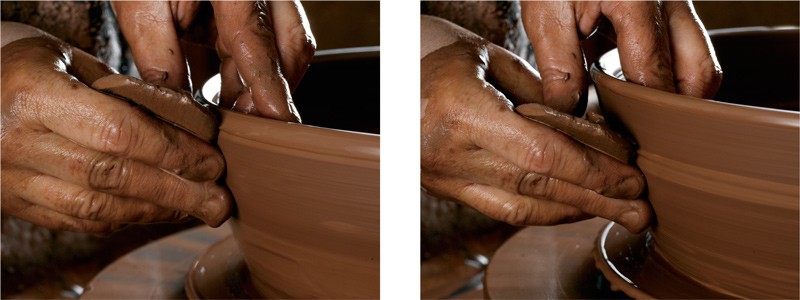
Procedural sequence showing the initial stages of turning an eighteenth-century Moravian-style mug on the wheel. A specified amount of clay is first centered and then raised using only the hands and fingers to form the cylinder.
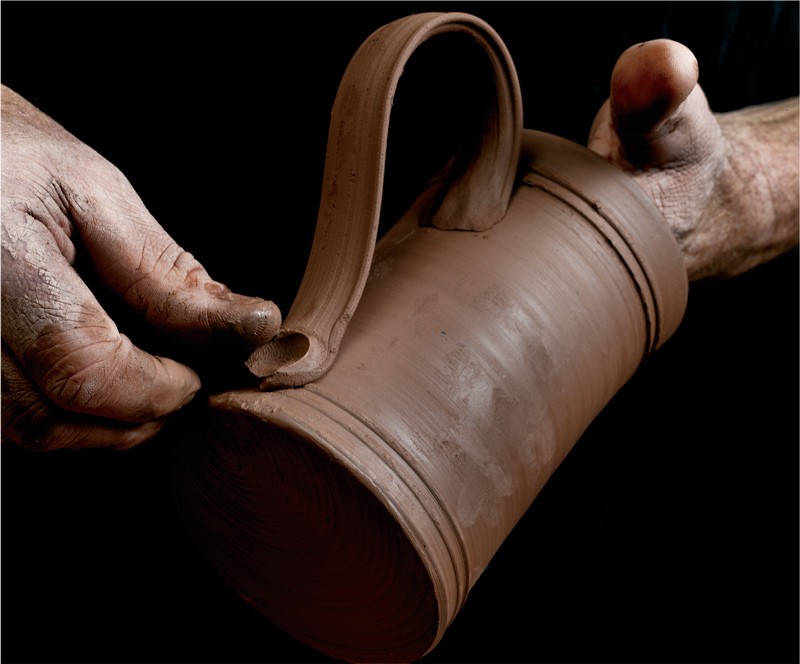
Once the form of the mug is raised, a grooved rib unique to each size and shape of mug is placed against the surface to produce moldings. Evidence of this technique is found on many Moravian mugs.

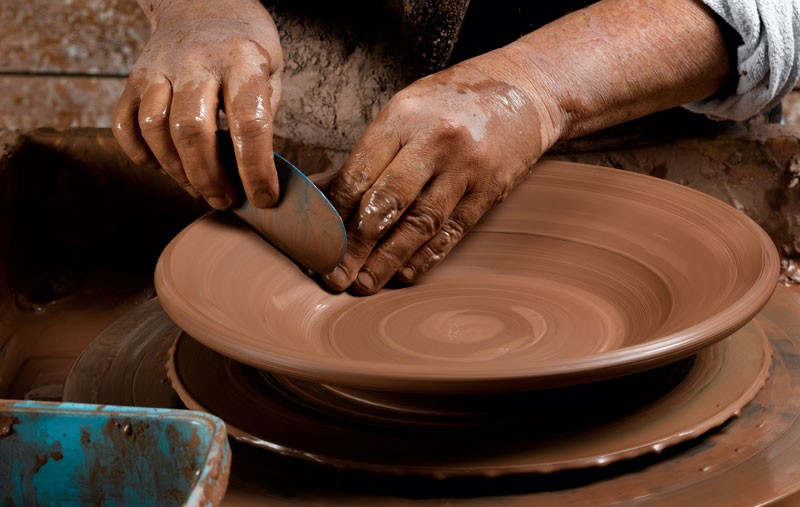
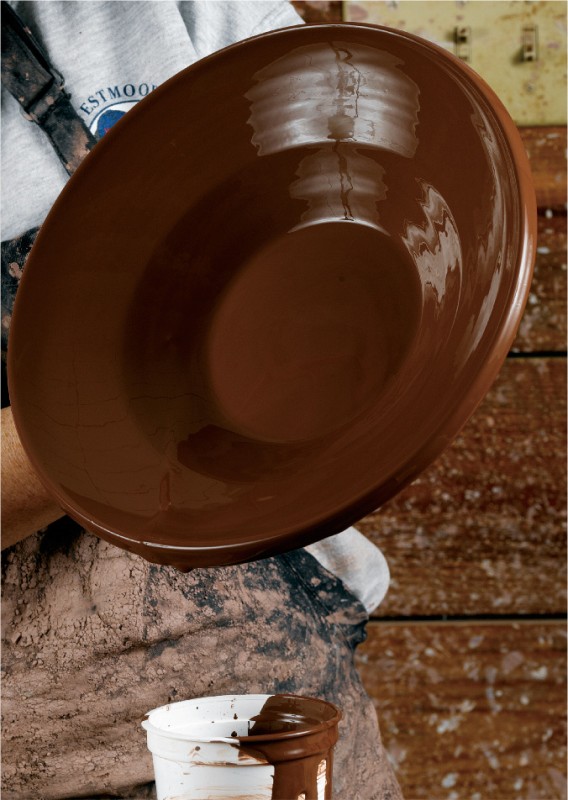
Some North Carolina pottery was cut from the wheel with a heavy string, leaving a shell pattern on the bottom of the mug if the wheel was moving at the time, or a striped pattern if the wheel was not turning. Although David Farrell is demonstrating this technique on a Moravian-style mug, Salem and Bethabara examples usually have smooth bottoms.
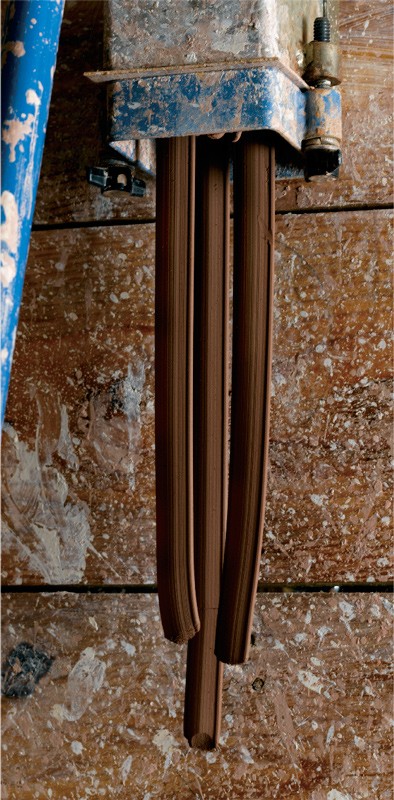
Molded handles hanging from an extruder, ready to cut to length and attach. This modern extruder is a bit more technologically advanced than the simple hand-pushed extruders used by Moravians and other North Carolina potters, but the principle is exactly the same.
Various handle terminal treatments were used on eighteenth- and nineteenth-century North Carolina earthenware. A simple thumbprint terminal is shown here, although this technique was not widely used by the Moravians.

Slip cups, Salem, North Carolina, 19th century. Left: Lead-glazed earthenware. H. 2 1/8". Right: Bisque-fired earthenware. (Courtesy, Old Salem Museums & Gardens.) These cups are typical of the form used by slipware potters in America and Europe. A quill has been inserted into the cup on the left.
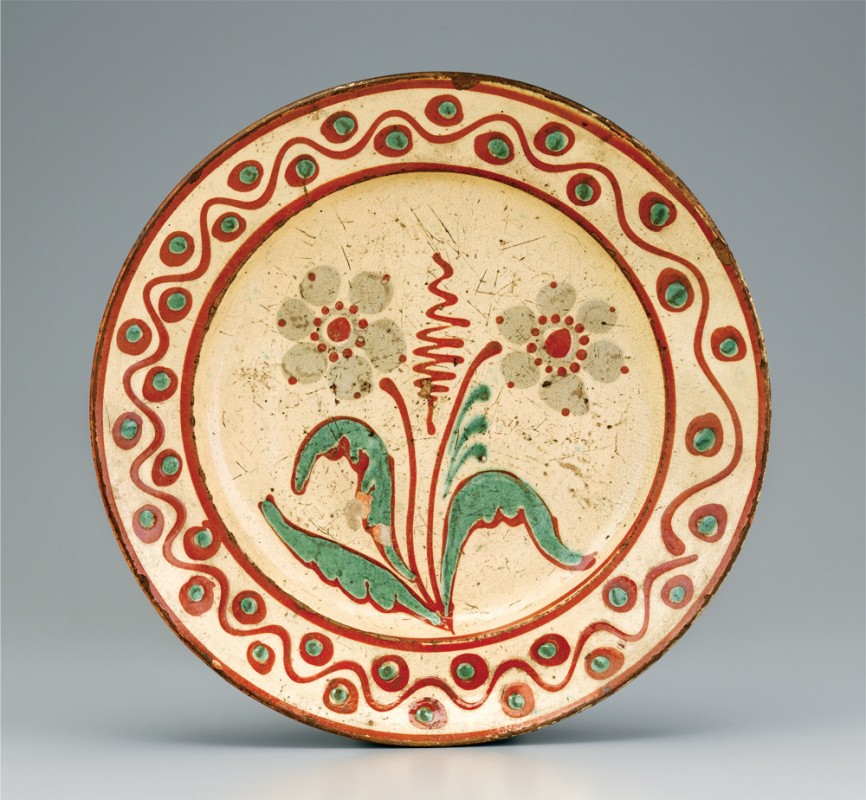
Dish, Randolph County, North Carolina, 1800–1850. Lead-glazed earthenware. Dimensions not recorded. (Private collection.)
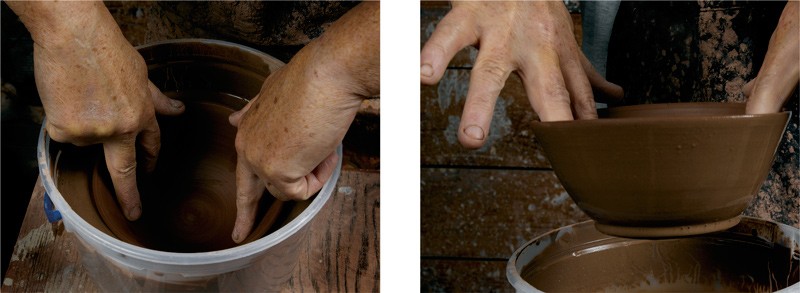
Only the hands are used in the beginning stages of turning a plate or dish. The clay is centered, then opened into a wide cylinder.
After the initial cylinder is raised, a flat or curved rib is used to form the plate or dish shape.

Period Randolph County dishes have a distinctive type of rolled rim. The stages of flipping over the edge of the rim are shown here.
The broad, flat marly is shaped and finished using the rib.
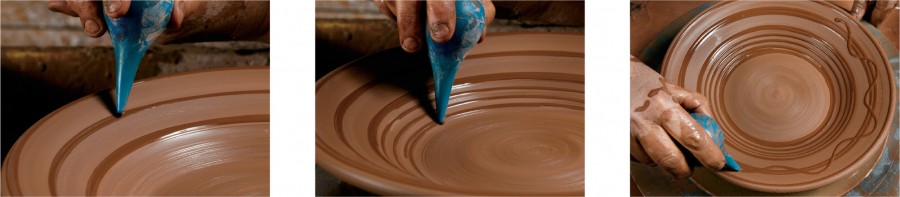
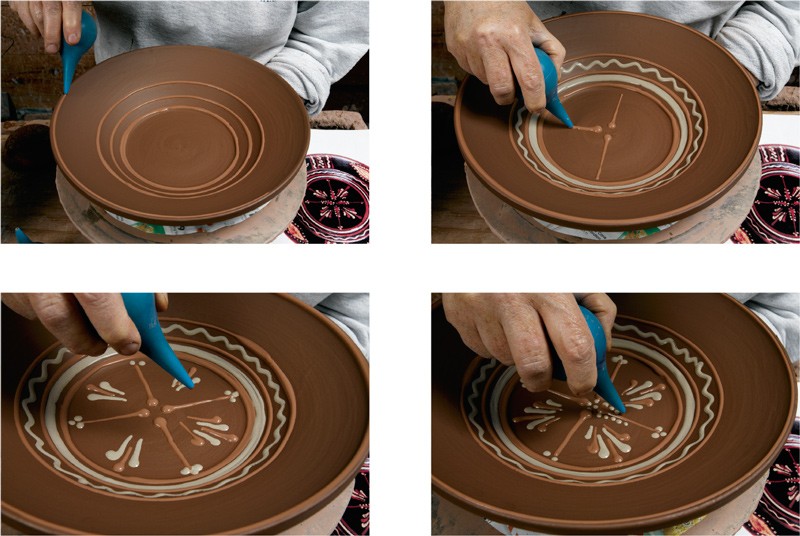
After the dish is turned and shaped, it is allowed to dry to a leather-hard state. The simple slip-trailing is accomplished using a very dark brown—almost black—slip. The wheel is slowly rotated while the concentric bands are applied, then rotated even more slowly while zigzags and the spiraling lines are slip-trailed. As on period dishes by this potter, the zigzags often do not meet up evenly. The decoration is applied with a modern rubber bulb aspirator.

The completed slip-trailed Randolph County–style plate in the wet state.
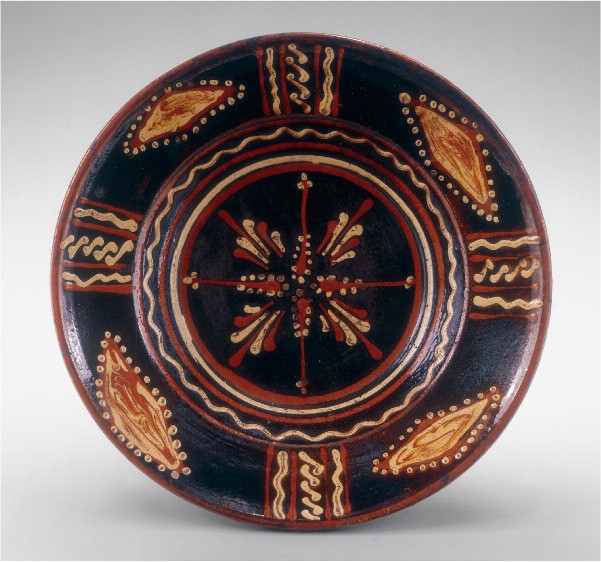
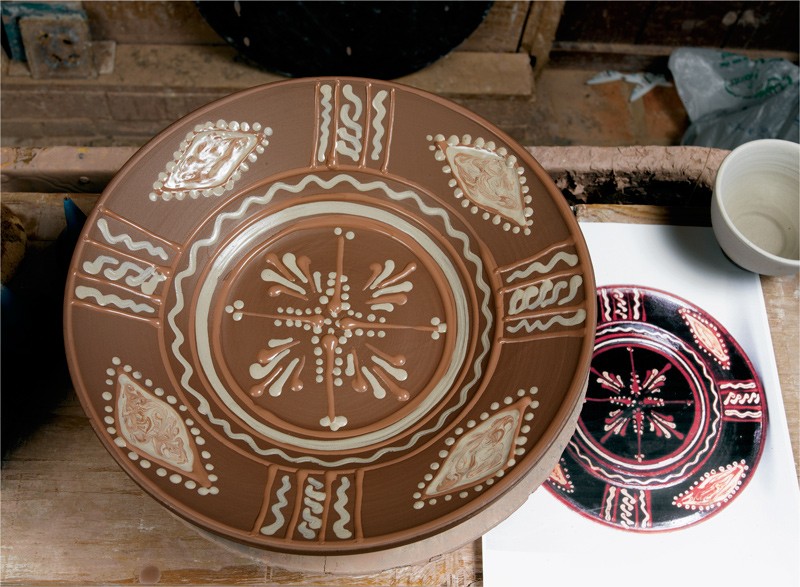
Dish, probably made during Rudolph Christ’s tenure as master of the pottery at Salem, North Carolina, 1790–1810. Lead-glazed earthenware. D. 12 1/2". (Courtesy, Old Salem Museums & Gardens.)
The process of forming a Moravian-style dish begins on the wheel with the raising of a broad cylinder. The contours of the piece are shaped with a combination of hands and a rib.
The original Moravian dish has a very distinctive rolled rim, a diagnostic trait on antique examples. This procedural sequence shows such a rim being created, by folding over a substantial amount of clay at the top. The edge comes to a peak before being rolled and rounded.
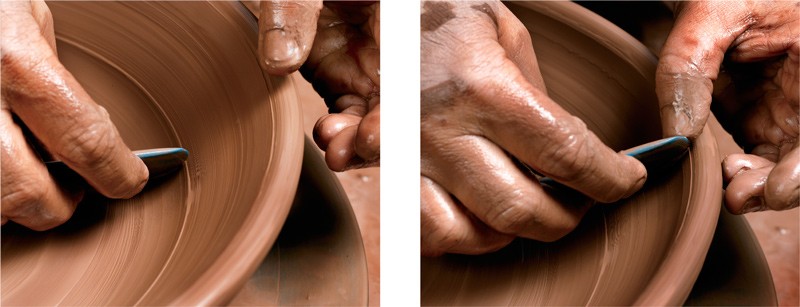
A curved rib is used to shape the shallow curve of the middle booge. The marlys of Moravian dishes are more concave than many North Carolina examples owing to their makers’ use of a curbed rib to flatten and smooth the surface.
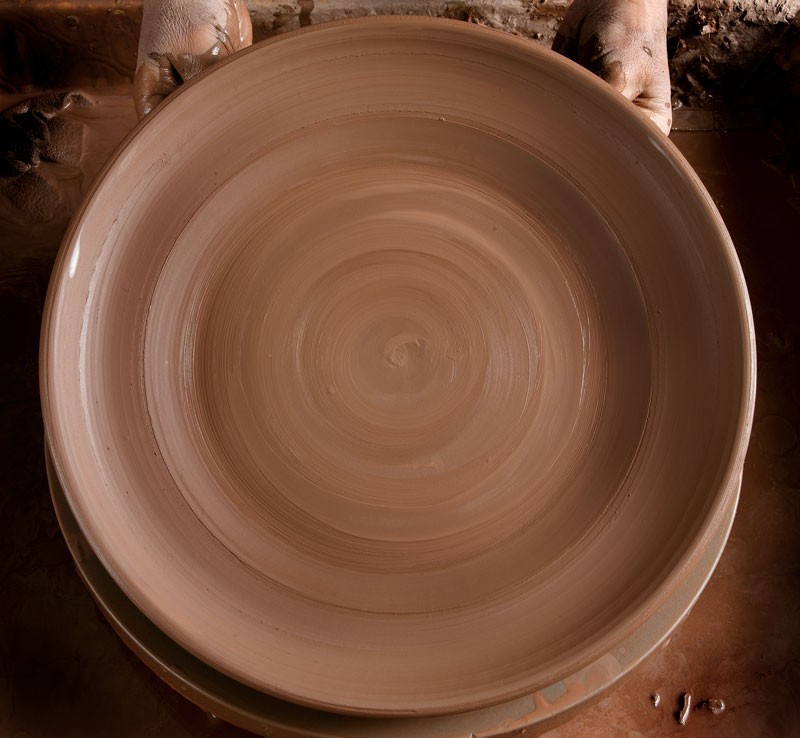
The finished thrown and shaped dish.
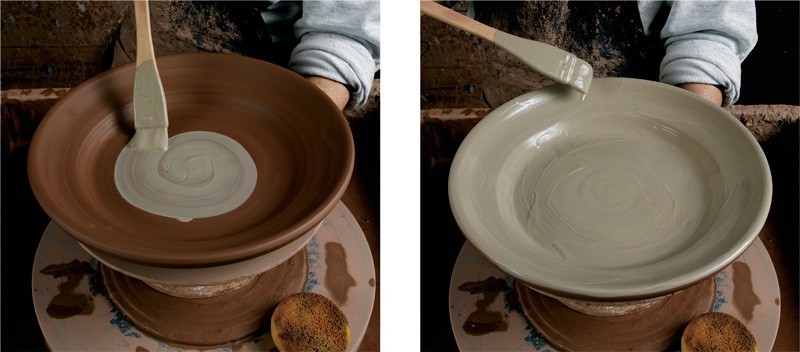
After the dish has dried to a leather-hard state, a base coat of cream-colored slip is applied with a brush. Four coats of the base slip are used, with very short drying time between each coat, in order to have a solid base color.
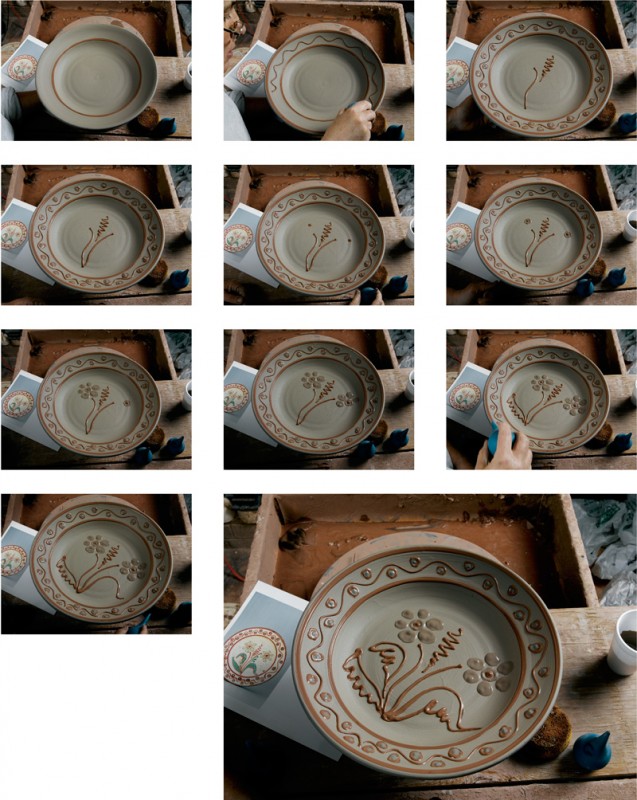
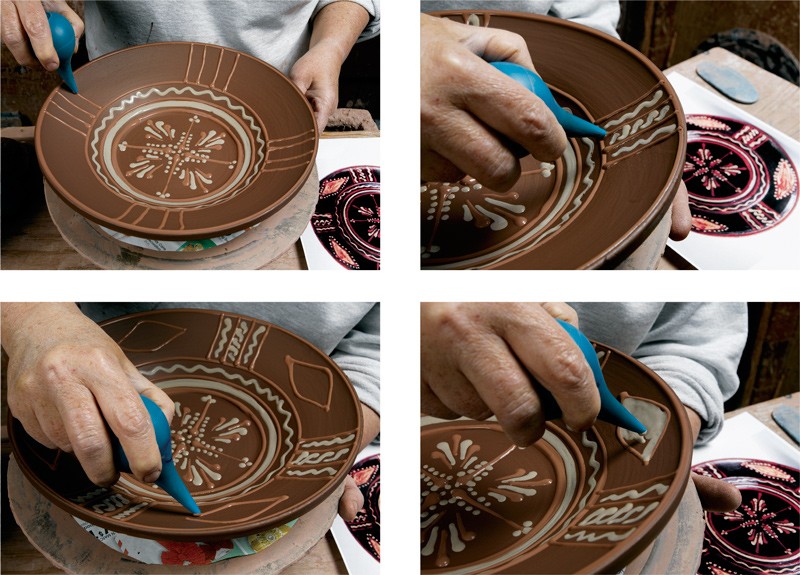
Once the background slip has dried enough so a finger pressed gently to its surface will not mar it, the slip-trailed decoration is applied. This series of photographs illustrates the sequence of laying out the various elements of the floral decoration like on the original (fig. 17). Note the loose, flowing lines used to create the flowers and the fairly simple rim pattern. The application of the slip is sketchlike and can be completed in a matter of minutes.
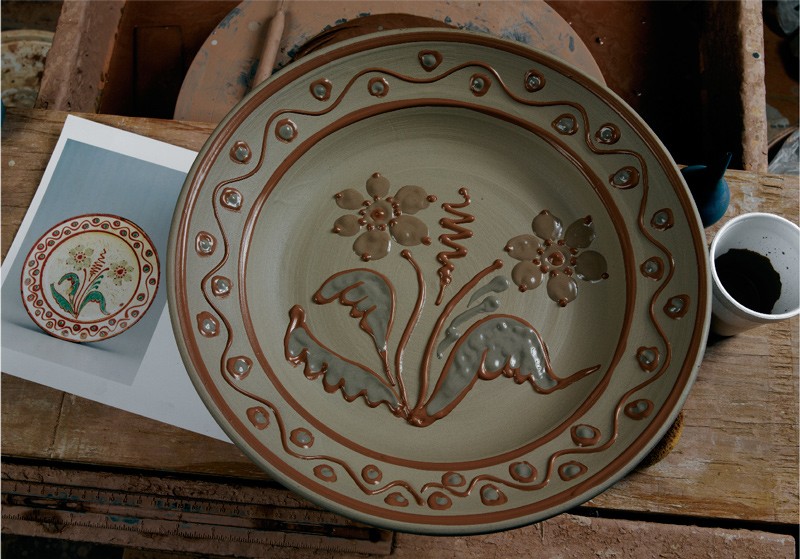
The replica Moravian plate, shown next to a photograph of the original, is left to dry before being bisque-fired. After being coated with lead glaze, the dish is given a final firing.
Dish, Alamance County, North Carolina, 1790–1820. Lead-glazed earthenware. D. 10 1/2". (Colonial Williamsburg Foundation.)

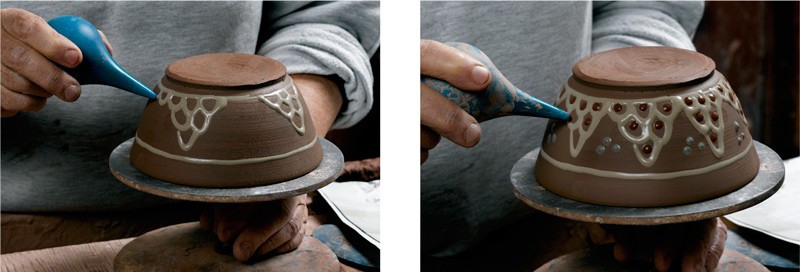
Procedural sequence showing the formation of the marly and rim on a replica of the Alamance County dish illustrated in fig. 25. A fairly small amount of clay is folded over and sealed against the underside of the plate. The rim has a relatively straight profile, and on the top surface only the edge curls up slightly.

The Alamance County dish had a small base, a fairly large and steep middle booge, and an upper rim with a curve just at the top edge. The base-to-upper-rim proportion is small.
The inside is coated with black slip. The distinctive shape of this potter’s dishes can be readily seen in this photograph.
Concentric lines of slip are applied to the replica Alamance County dish after the background slip has been allowed to dry somewhat.
The Alamance County potter whose work is being replicated here typically used more elaborate marly decoration than his Moravian contemporaries. He apparently began trailing in the center, then worked his way out. The lozenge-shaped elements are laid out in red slip then filled with white slip.
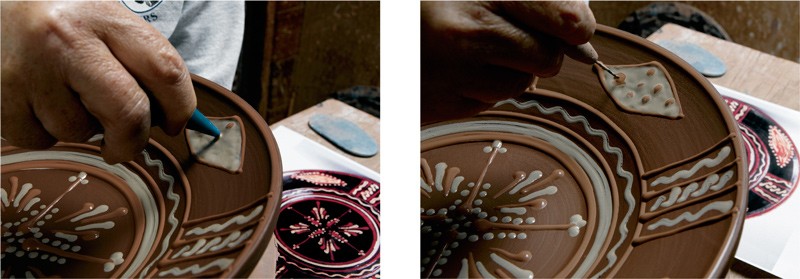
Dots of red slip are placed systematically on the white ground of the lozenges.

A needle tool is used to create the marbled effects by swirling the dots of red slip into the wet white ground.
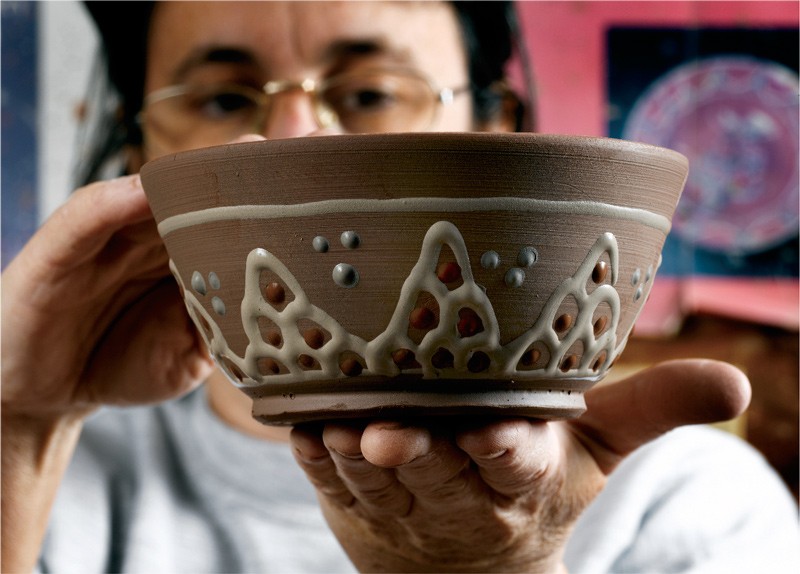
The decorated replica dish, shown next to a photograph of the original, is left to dry before being bisque-fired. After being coated with lead glaze, the dish is given a final firing. The heat from the firing and the addition of lead glaze will change the colors of the slips close to those of the original dish illustrated in fig. 25.
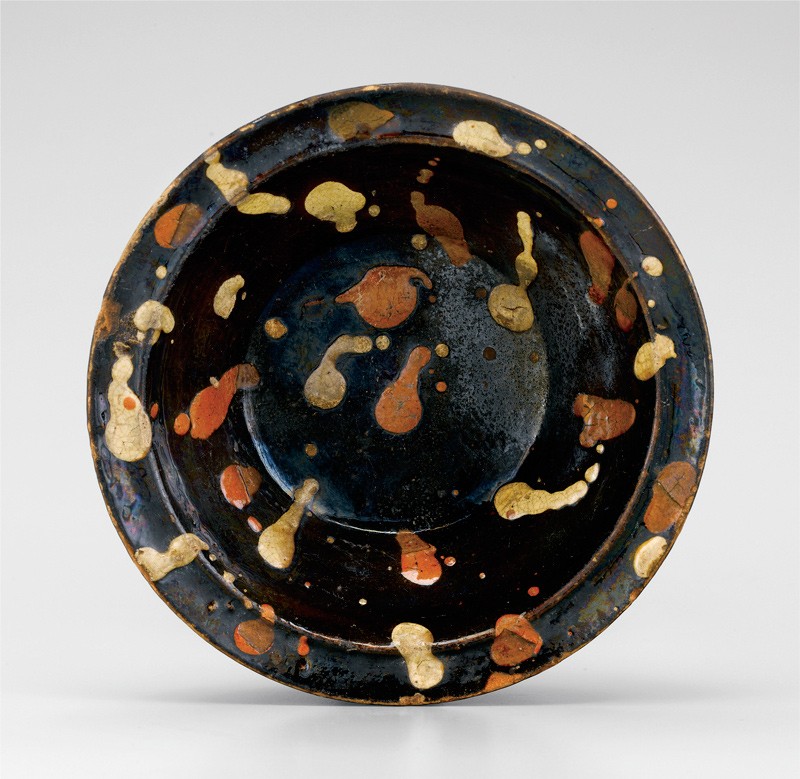
Bowl, attributed to Solomon Loy, Alamance County, North Carolina, 1825–1840. Lead-glazed earthenware. D. 6 1/4". (Private collection.)
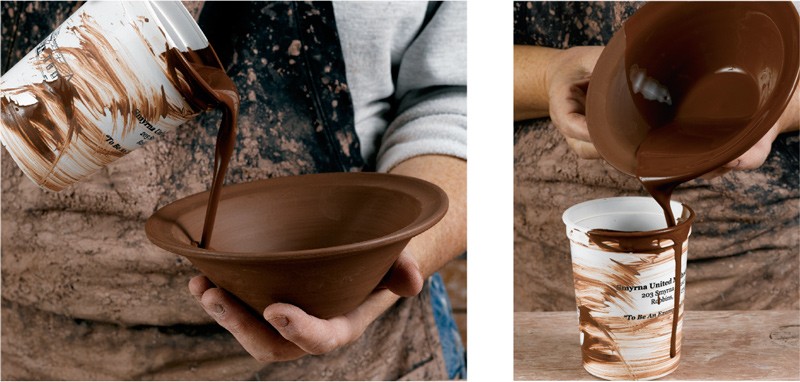
Slip is poured inside the leather-hard bowl to coat the surface, then the excess is poured out.
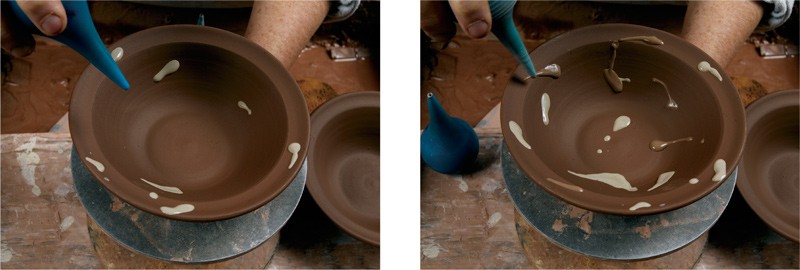
Dripping various colors of slip is a technique associated with Solomon Loy. This process takes only a few seconds.
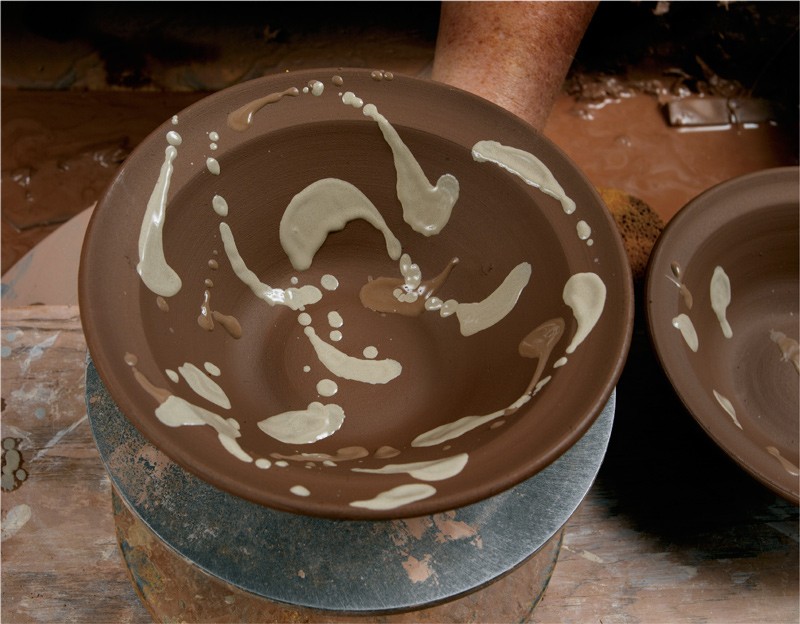
On some period examples, it is apparent that the piece was rotated slowly during the application of the slip, which gave the drops a slight curve.

Bowl, Alamance County, North Carolina, 1790–1820. Lead-glazed earthenware. H. 3". (Private collection.)
A bowl, still damp, is dipped in orange slip that is only slightly different in color from the clay the piece is made from. The bowl is then allowed to dry a bit before being slip-trailed.
The bowl is placed upside down on a banding wheel and decorated with cream, green, and dark brown slips. By trial and error, we realized the original bowl (fig. 38) was slip-trailed while upside down rather than right side up.
The replica bowl, just after being slip-trailed. When the piece is dry, it will be bisque-fired, then covered with a clear-firing lead glaze for the final burning.
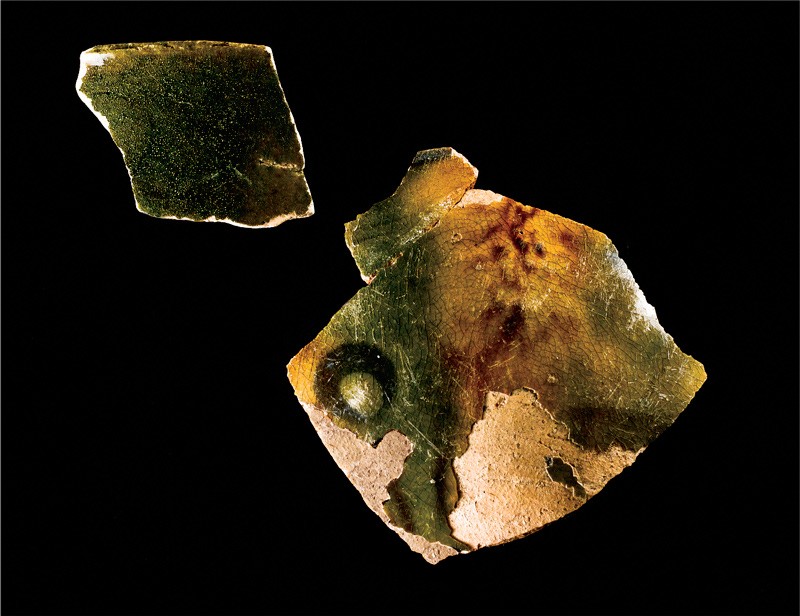
Teabowl fragments recovered at the Mount Shepherd pottery site, Randolph County, North Carolina, 1793–1800. Lead-glazed earthenware. (Courtesy, Mount Shepherd Collection, Mount Shepherd Retreat Center.)
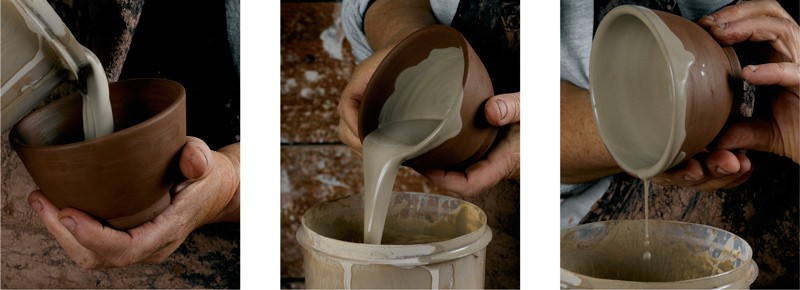
Light-colored slip is poured into a Mount Shepherd–style teabowl while it is still damp. Excess slip is poured out and wiped off the exterior. The wet slip makes the bowl very moist, which could cause the form to collapse, so the bowl is allowed to dry somewhat before the exterior slip is applied.
After a period of drying, the outside of a Mount Shepherd–style teabowl is dipped in the light-colored slip.
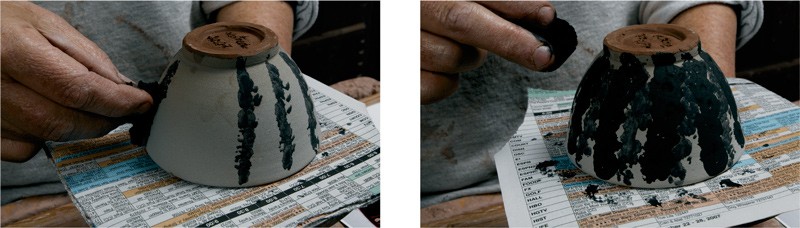
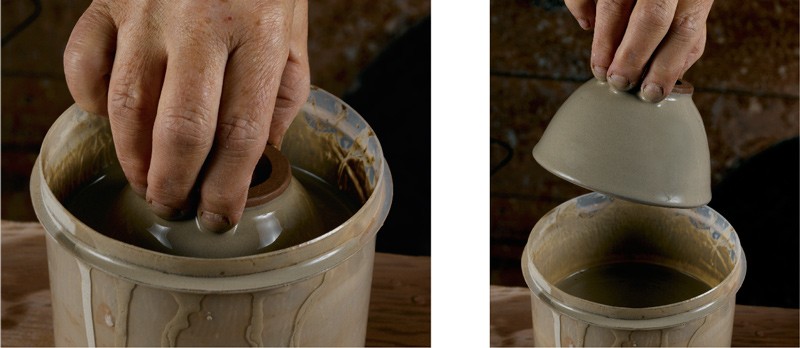
On the Mount Shepherd-style teabowl, the slip background is allowed to air-dry completely before the initial decoration is sponged onto the surface in alternating bands. This ensures that the applied copper and manganese oxides will be properly absorbed into the surface.
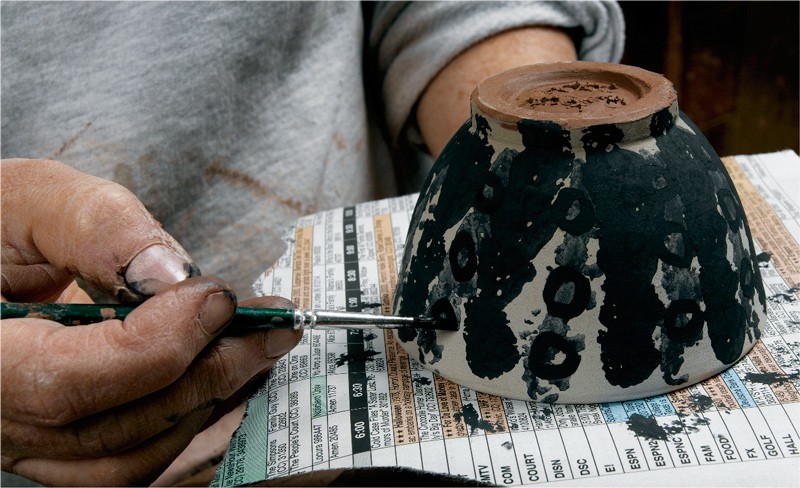
Once the sponging is completed, a brush is used to apply small circles of manganese oxide and water over the copper oxide bands, as seen on the original specimen.
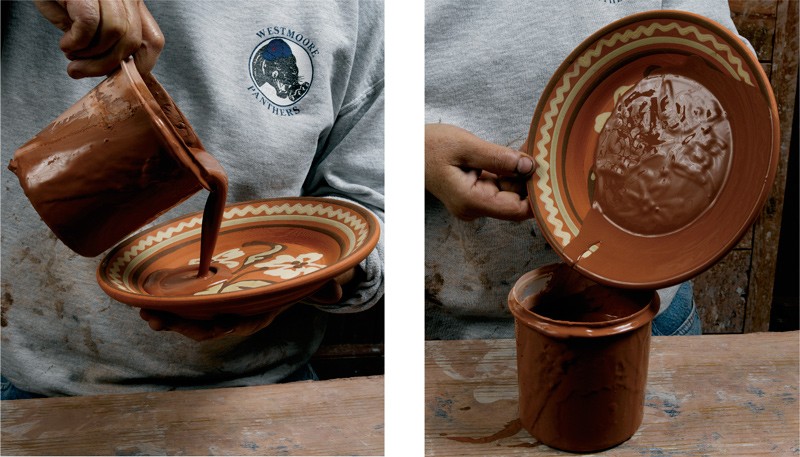
After the decorated wares are bisque-fired, the final glaze is applied by pouring and/or dipping. During the second firing, this glaze will melt to form a clear glass, allowing the decoration underneath to show through. Unlike period examples, the glaze being applied here is lead-free, so the finished piece can be used safely with food.